
Print Autel 3rd Generation Scanner Data via WiFi

The original print via PC-Link needs to be done through a computer, and there are too many operation steps. The new 3rd generation Autel diagnostic tablets add print via Wi-Fi features. Users can print directly by clicking on the tablet. The original print via PC-Link is retained, and the user can choose freely.

The advantages of Wifi printing:
*   Print via Wi-Fi supports the vast majority of printers in the market.
*   Support Ultra management program picture & pdf file printing.
*   Mopria Print Service app print plug-in is distributed with the management program and installed silently. Users only need to agree to the agreement to use it.
*   Support the printer’s own Wi-Fi direct printing.

Requirement:
Management system program version: V2.09 and above

Compatible Autel scanner:
Support products platforms: Ultra, MS909CV, Elite II, MS906Pro
Support products list: Ultra, MS909, MS919, MS909CV, Elite II, MS906pro

Operation Guidance

Option 1: The printer and the tablet are in the same local area network (Same Network and the same network segment)

1) Make sure the printer and tablet are on the same local area network.

Print-Autel-3rd-Generation-Scanner-Data-via-WiFi-1

2) Enter print page.

Print-Autel-3rd-Generation-Scanner-Data-via-WiFi-2

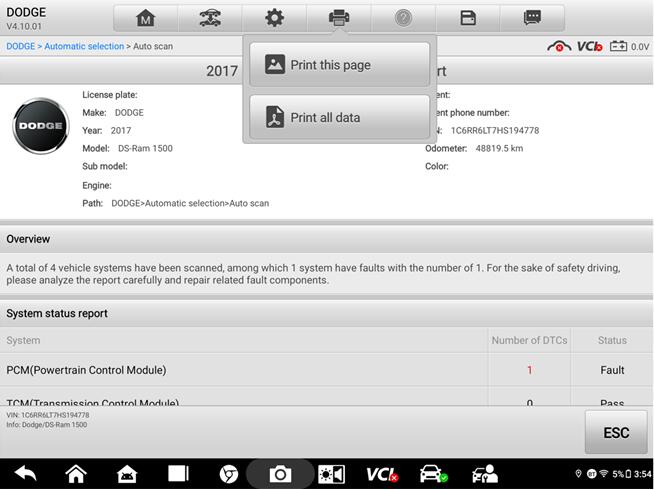
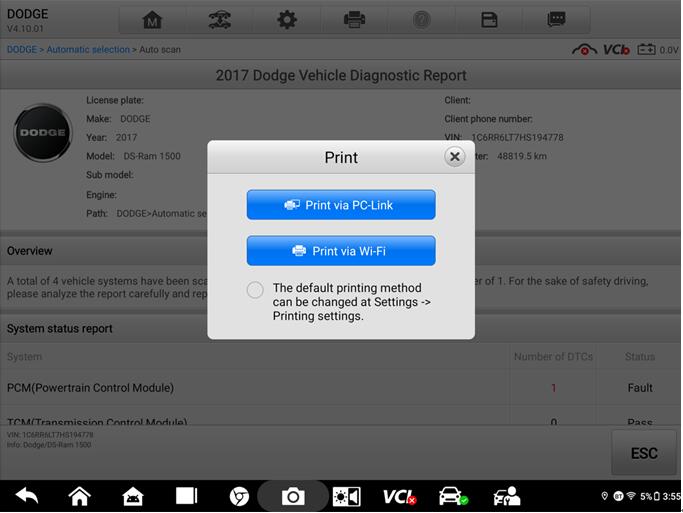
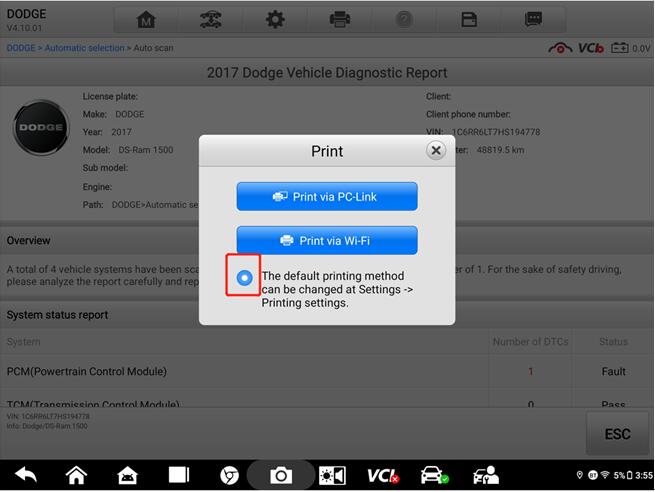
3) Click print this page, a pop-up box will pop up to select the printing method, select Print via Wi-Fi the first time to use it.

Print-Autel-3rd-Generation-Scanner-Data-via-WiFi-3

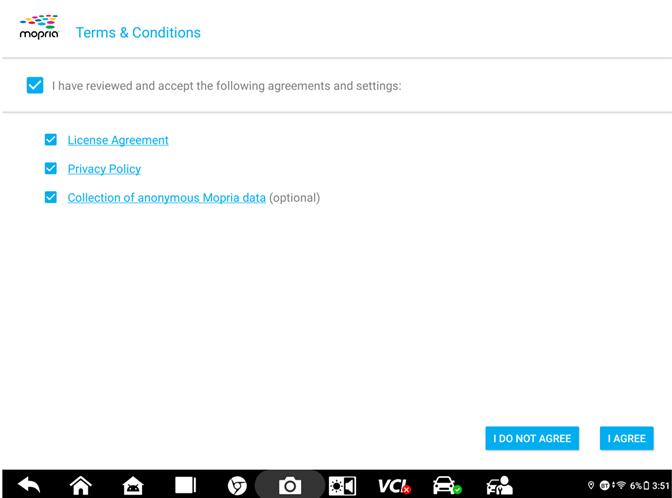
4) Click Print via Wi-Fi, and the preview page will be displayed: You need to check the required items: License Agreement and Privacy Policy, and click Agree. (The printing plugin of Mopria Print Service app will be installed silently at this time).

Print-Autel-3rd-Generation-Scanner-Data-via-WiFi-4

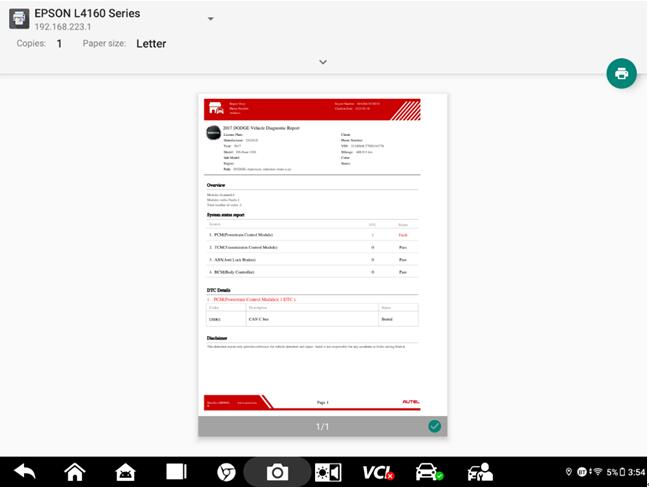
5) After a while, the print preview interface will be loaded. You can switch the printer in the upper left corner to select the printer on the same local area network as your tablet, If an icon appears in the upper right corner, the connection is successful, then click Print.

Print-Autel-3rd-Generation-Scanner-Data-via-WiFi-5

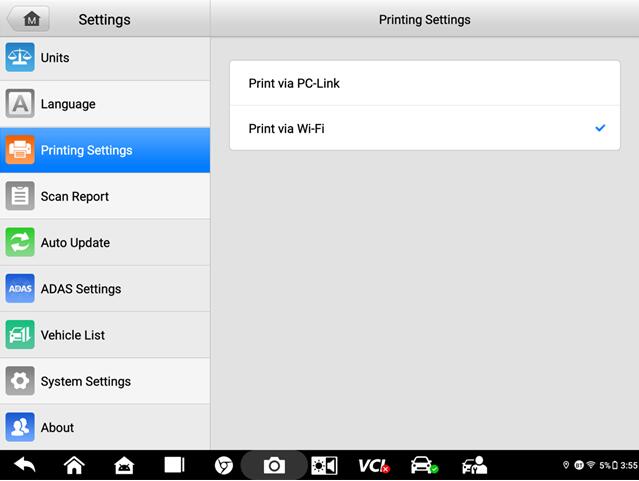
6) You can also select Print via Wi-Fi as the default printing method in step 3), or directly set Print via Wi-Fi as the default printing method on the settings page, so that you can use this function later

Print-Autel-3rd-Generation-Scanner-Data-via-WiFi-6
Print-Autel-3rd-Generation-Scanner-Data-via-WiFi-7

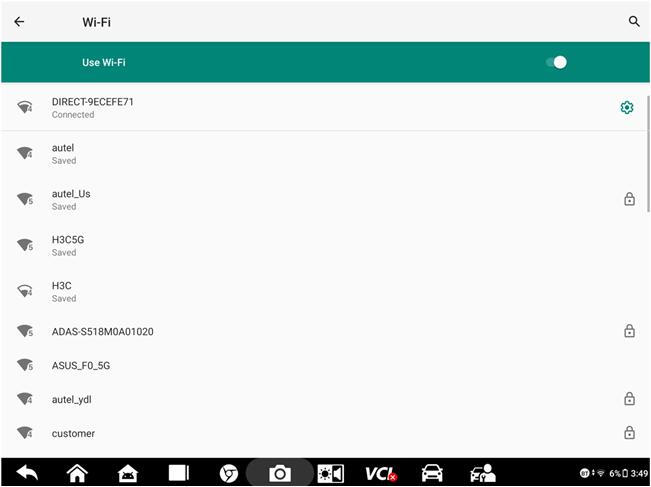
Option 2: Wi-Fi Direct printing, that is: the tablet is connected to the local area network provided by the printer.

Confirm that the printer has this function (here, take HP printer as an example). This printing method is to connect to the local area network provided by the printer. After connection, the operation process is the same as that of option 1.

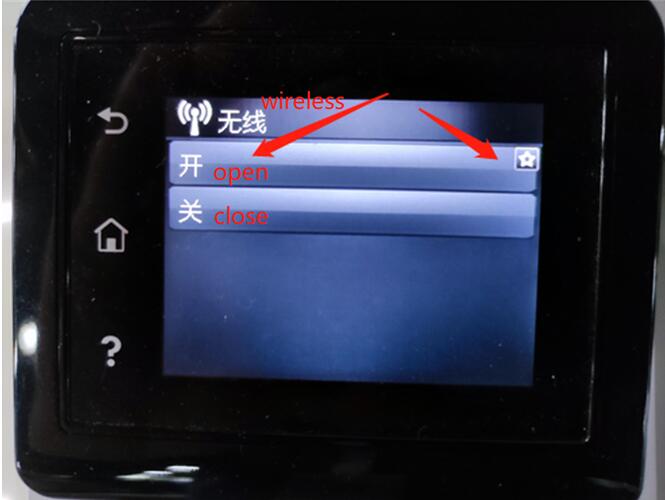
1). Make sure the wireless network of the printer is turned on, as shown in the figure below

Print-Autel-3rd-Generation-Scanner-Data-via-WiFi-8

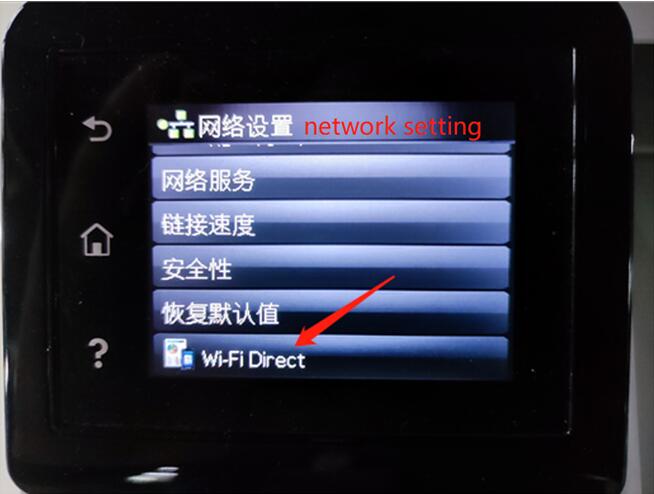
2). Find Wi-Fi Direct in the printer network settings, as shown below

Print-Autel-3rd-Generation-Scanner-Data-via-WiFi-9

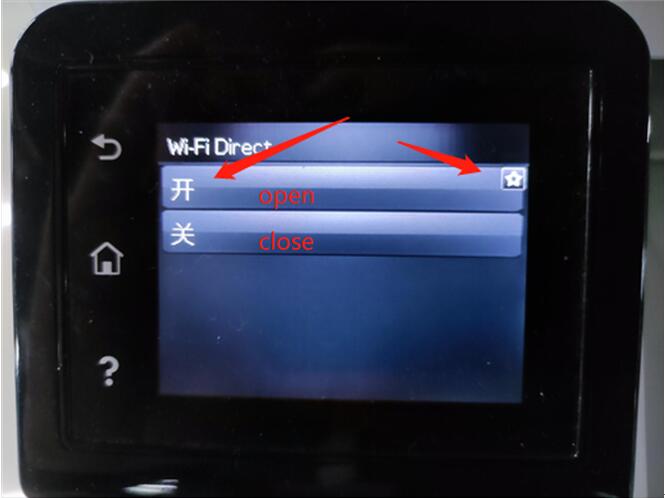
3) Turn on the printer Wi-Fi Direct, as shown below

Print-Autel-3rd-Generation-Scanner-Data-via-WiFi-10

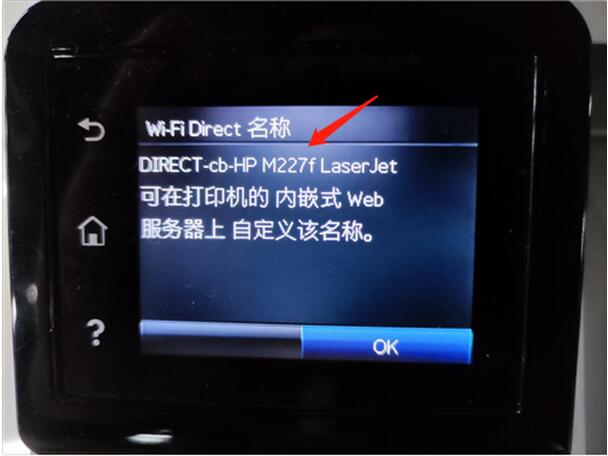
4) Check the name of Wi-Fi Direct, as shown below

Print-Autel-3rd-Generation-Scanner-Data-via-WiFi-11

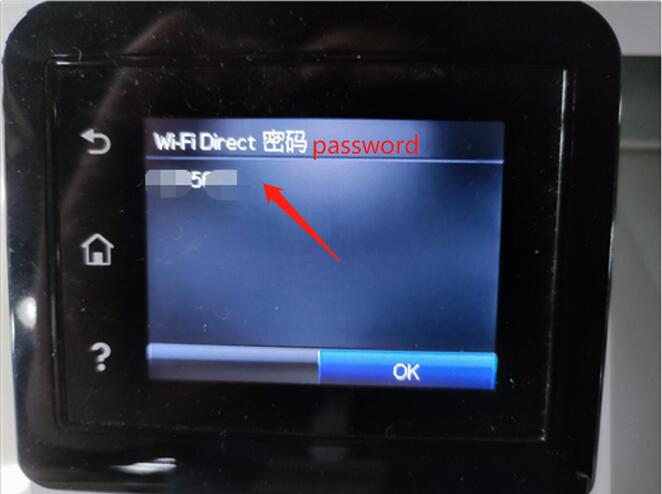
5) Check the Wi-Fi Direct password. After the tablet is connected, it will be in the same local area network as the printer. The operation process is the same as the one selected, and then this function can be used.

Print-Autel-3rd-Generation-Scanner-Data-via-WiFi-12

Comments

Popular posts from this blog

How to Delete Software of AUTEL MaxiSYS Pro MS908P

WIFI AUTEL MaxiSYS Pro MS908P is with complete capabilities for codes, live data, actuation tests, adaptations, coding and ECU programming.And sometimes,some of car software in the device can not use correctly,you may need to delete the software and download the car software again to Autel Maxisys Pro. New  Autel Maxisys Pro MS908P Diagnostic System with WiFi Free Shipping How to Delete Software of AUTEL MaxiSYS Pro MS908P? 1.Start the machine,and click Data Manager. 2.Click Apps. 3.Then it will display the car software in the device. 4.Choose the car software you need to delete. 5.Click the delete button to remove.

How to Activate Autel AP200 OBD2 Scanner with Full Brands

  Activation of all brands for  Autel AP200 Bluetooth OBD2 scanner is possible, but without special functions (adaptation, coding), only diagnostics for all modules and reset of service intervals. But it is a good alternative for personal use for DIYers. When activated for all brands, the program also performs only diagnostics for all makes. Such an adapter is suitable for personal use and auto-fitting. For car services, it will be a tool for quickly reading errors from all makes. Activation of all Autel AP200 brands in Xdiag ap200 indefinitely You can activate in 2 ways: 1) Through the Autel Start program 2) Through the Xdiag AP200 program, which has shown itself to be on the good side in working with Launch adapters. Here are some images showing  Autel ap 200 activations for all brands: Upon activation of Autel ap200 for all brands, you can search Google (i.e famous 4pda.to website). It has instructions to install cracked app and install database for all...

Autel MaxiDas DS808 Software and Firmware Update Manual

  Firmware Upgrade for Autel MaxiDas DS808 This option allows you to update the firmware of the scan tool. Connect the scan tablet with the vehicle through DLC or use the mini USB cable for power supply. Follow the on-screen instructions to complete the operation. Internet connection is necessary for this operation. How to Set “Auto Update” for Autel DS808? The Auto Update allows the tool to automatically update the OS, the MaxiDAS system, and the Vehicle. All you need to do is to switch ON by tapping the button on the right side of each and set the desired automatic update time. To set auto system or vehicle update 1. Tap the Settings application on the MaxiDAS Job Menu. 2. Tap the Auto Update option on the left column. The three auto update items list on the right. 3. Switch the ON the button on the right of item that you want to auto update. 4. Tap on the time to set time, you can use the + and – button or tap on the numbers then the manual input screen will pop...