SVCI 2020 is working OK with Opel 2009. I can extract the PIN code, key cutting code and program the new key without problems. Here is the tip to use SVCI 2020 commander to delete keys and transponder chip in a Vauxhall / Opel Zafira 2009 and program a new remote control car key.
Connect SVCI 2020 with vehicle
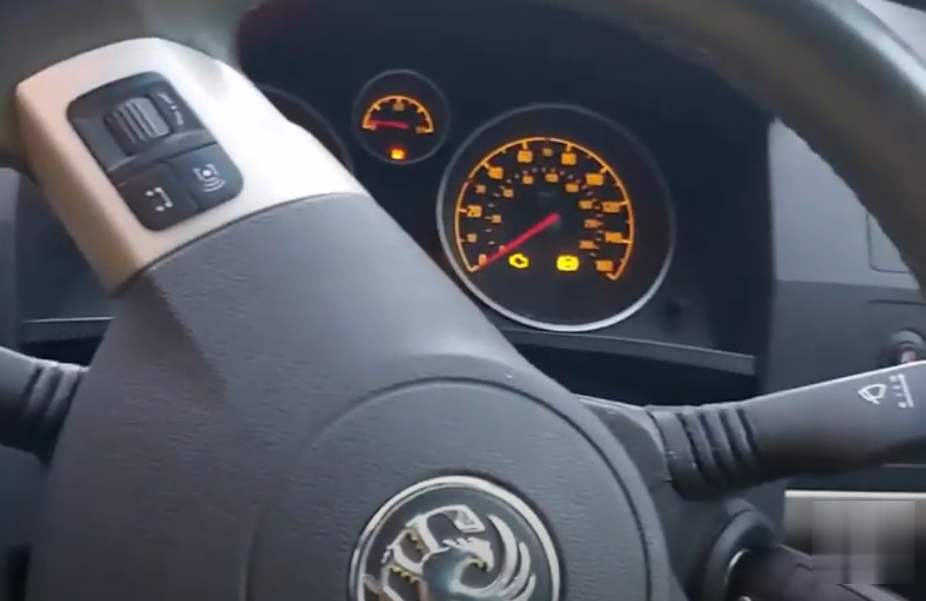
Turn in ignition switch with a working key
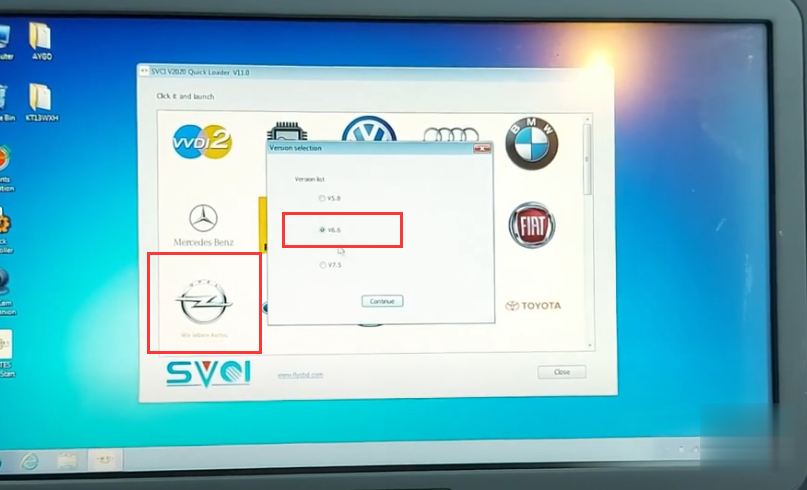
Run Opel software, choose software V6.5
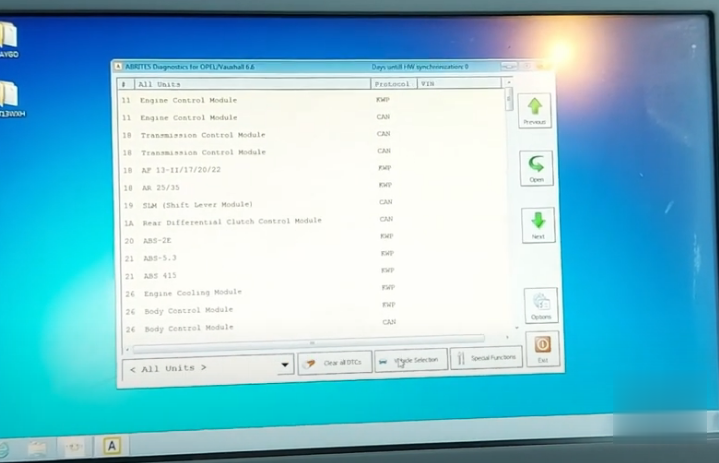
Go to Vehicle Selection -Special Function – Read Security Code

Select vehicle model Zafira B and press Read
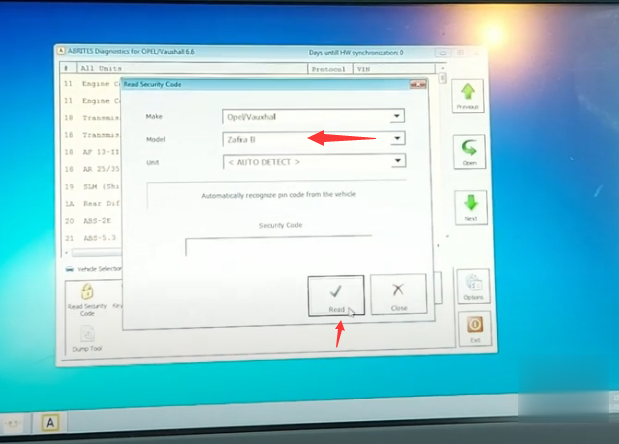

SVCI 2020 Read security PIN code success
Select Key Learning Function – Zafira B, press Connect
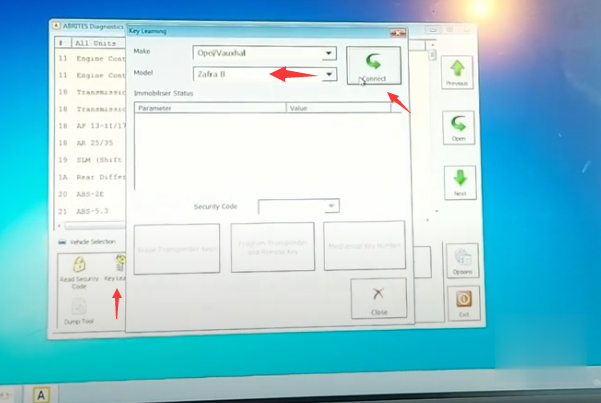
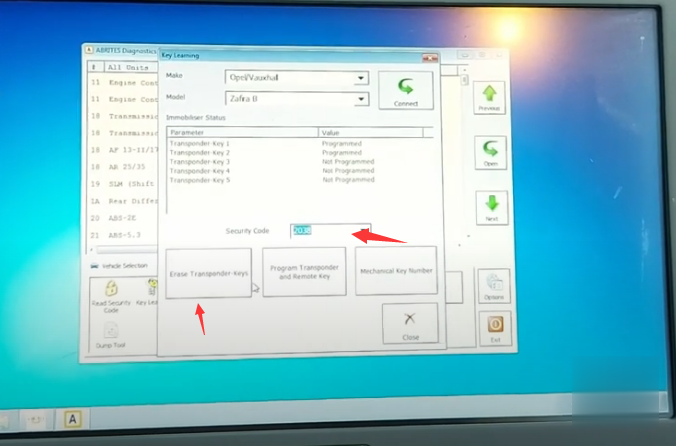
Then input pin code and press Erase Transponder Keys
Turn ignition off
Turn ignition on
Erase key success
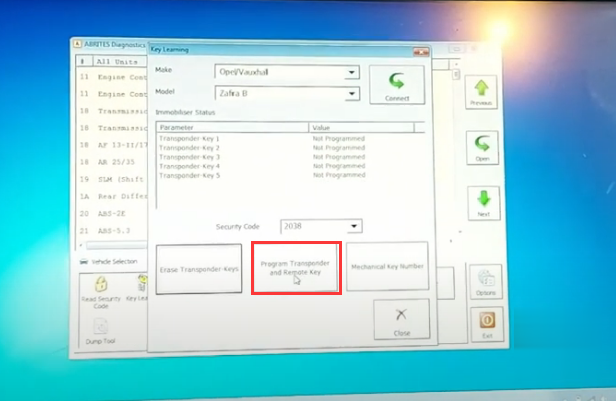
Select Program Transponder and Remote Key
Insert non-programmed transponder key and turn on the ignition
Turn ignition off
Turn ignition on
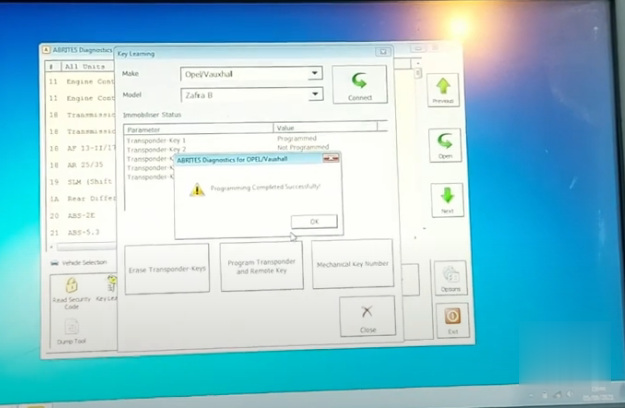
Program completed.
Test the new key. It is working.
Comments
Post a Comment